As you see more and more of Brandy’s CAD (computer aided)
designs in my shop, I thought it might be time to explain the design aspect of
the process a bit more. This will also
help you if you are interested in placing a custom design order that requires
CAD.
When do
you need CAD? CAD is extremely useful
when you don’t want to make a design from scratch in metal, and especially when
you have an idea that is more complicated, like my halo and multi-stone rings. Imagine how long might take to make all those
tiny little prong settings, for instance.
CAD is also useful when you have a specific stone and can’t find any
stock settings that work. But CAD
doesn’t work well for flowy designs, and the geometry for certain shapes is
incredibly complicated. The more curves,
ridges, settings, the more detail in other words, the longer it takes.
 |
| Wedding Band CAD with Dimensions |
A CAD
ring will indeed take several hours in design work, or even more. A simple setting might only be 30 minutes,
but if you’re designing a complicated gallery for instance, adding all those
curves and finalizing the dimensions can take an afternoon. After that, the CAD model has to be “printed”
in plastic , then cast in base metal, then molded, then again cast in the
desired metal. You can also go straight
to casting from your plastic model, but if you then need another one, you have
to print again, and printing can cost up to $100. 3D printers are expensive, and the printing
process is slow. Long story short, you
are looking at a few hundred dollars before you so much as have a first
casting.
Since
CAD works on a mathematical basis, you need all your dimensions pretty well
worked out before you can begin, and you may need to refine them as you design,
or go back and forth with your CAD person.
This includes inside diameters of bezels, thickness of bezel walls,
prongs, etc, for each part of your ring.
Brandy, who is very good at this, often supplies these after I give her
the stone, or stone dimensions, the basic ring dimensions and my drawings. She knows how deep a setting has to be to fit
a stone, what wall thickness is required for a bezel, how much space to leave
between stones, and other things you’d never think of if you haven’t done this
a lot. Nevertheless, sometimes Brandy
and I have to sit together for a couple of hours and hash out specs as we try
them out on the screen.
 |
| This Cluster Ring is not Done Because We're Working on the Gallery , Often the Hardest Part |
You also
need to have a good sense of imagination, because a lot of time a model looks
one way on the computer, another way when it is printed and cast. One of my new rings ended up too heavy on the
top, and the shanks were too thin to make it look balanced. And when you plan to add stones in a beaded
or burnished setting, you need to be able to visualize how the piece will look
when it’s finished, because on the screen, and even in the silver casting, it
will just be an empty canvas.
 |
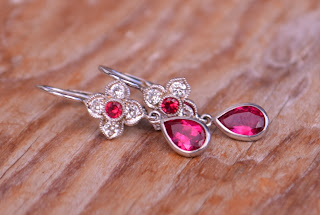
| My Victorian Flower Earrings Before Setting |
 |
| A Finished Design with the Same Setting |
Sometimes
other impracticalities intrude that you don’t think of. Your finger is too small to support several
stones in a row, or sizing will be an issue later. Eternity bands have to be done for each size
for instance, and in each case you have to change the design a little. You also can’t just make a design bigger or
smaller because you will want to shrink just certain aspects (i.e. the center
setting but not the shank). This means that
certain changes in size necessitate many other changes down the line.
Finally,
you have to think about practical aspects during casting and printing. The ring I made (below) cannot be cast in
one piece because the silicone could not get underneath the ring. So Brandy made a gallery, lifted the top and
made two designs that have to be assembled after casting. Also, since you can’t cast in two metals at
once, any two tone designs require two models that have to be fitted together
and assembled.
 |
| Shank is Too Narrow (The Thing on the Right is the Sprue) |
 |
| Can't Mold in One Piece |
 |
| Top is Too Thick, Needs a Galllery |
Great entry, and fascinating process!
ReplyDeleteI am big fan of FreeCAD from version 0.12. I have just tried Autodesk 123D Design software which is rather simplified but fine software from my point of view. This software is for free and I believe it is preparation of Autodesk for era of 3d printer.
ReplyDeletea1 printing